Monday, January 30, 2012

Bathroom update

Well the aim was for a picture perfect bathroom by the end of the month and I think we did pretty well.

Doors are on the cupboard.
 I have got a couple of nice little pots for soap and cotton wool too.

We got a shelving unit and it fits very well. I was worried it was too big as it goes where the slope of the roof is lowest but it is fine. If you look carefully at the wall to the right of the shelves you can see a line which is the chrome edging stripe above the tiles. A few inches above that the roof joins the wall before rising up as it goes over the toilet. I did a little montage to get the toilet in the photo too. I don't have any wide angle ability on my camera and the bathroom is only 2m square which makes taking photos a challenge.  To the left of the toilet is the window and then at right angles to that is the sink. the shower is in the  next corner round and then the door is in the final corner on the other side of the towel rail.

We do have several  more matching towels but they had already been used by the time I got to take these shots. One of the jobs on the to do list is go through towels and bedding and assign them to different rooms so we have less random mixes of colours !!

Other basics acquired include a loo brush in a holder (hiding behind the loo and just visible if you look hard) and the toilet roll holder. We also got a mat for outside the shower and I found some nice stick-on shapes in blue which hold up shower gel bottles very well so no need to try drilling holes for a shelf.


So it's totally finished right! Well no we don't have a mirror. That's partly because Tom's sister has offered us one she has and we are waiting to see if it is suitable. Problem is we need to co-ordinate us and it being in the same place at the same time as they live on the south coast ! We may also put a long one behind the door which is opposite the toilet and next to the shower. (update - since writing this as a draft we have got a mirror which will work even if we replace it later but it isn't up yet)

One other change we may make is to swap the tap handles for lever ones as there are optional ones in the box which I had forgotten about till I went to throw the boxes away ! I think a basket or two for on the shelves might be good too but that depends what we decide to keep up there.

Someone insisted I wanted a picture of them as well !

Once the heating is fully operational or more likely when spring comes I will find a plant or two for the windowsill but it's a bit cold currently when the room isn't in use. The heating in the room is finished but the rest of the zone and indeed the manifold it needs to attach to is not and so only the towel rail works currently not the underfloor heating.

Thursday, January 26, 2012

A few little bits

I've actually managed to finished a few things recently though there are lots of half finished ones still knocking about !

Firstly a little family of owls.. no good reason for them I just liked the idea.

Secondly Treestump decided to have a spate of loosing gloves so I decided to make him some mittens. He was very enthusiastic about the idea and is less fussing than his brother about wool and it being itchy so I used a nice bright green I picked up from our local wool shop which is pure wool in a sock weight. I totally winged the pattern making it up as I went along, measuring his hand in the dark while he was asleep ! Had a couple of panics they were coming out too big but no his hands really are huge.


Silly face time !
After the photo I added the traditional string (just a chain of crochet) so they can stay in his coat. I attached them to the back of the neck so they stay level and are less likely to catch round his neck or anything. He loves them and keeps telling me they make his hands warm. He obviously told the teacher I made them for him in pre-school to!

Thursday, January 05, 2012

The grand plan house wise for January

As many will know we had a lot of work done on our house several years ago and then it ground to a halt for various reasons. Just recently we have had some of the remaining work done and our new builders have been fabulous about finishing the bathroom in the loft.

Before I go on can I just say it's impossible to take good photos of small rooms !!

There were some head scratching moments and some problems to overcome but they managed them all and we now have a 95% finished bathroom. Before Christmas it had no floor and just bare plaster on the walls.  Now we have a floor and the underfloor heating pipes under it with the excess coiled ready for me to continue the zone in the main room. All the plumbing is in, including the soilpipe for the loo which they managed to plumb into the existing downpipe saving a fair amount of money as the original plan had a new one in a different place. The downside is we can't resite the loo in the first floor without the extra soilpipe but we can live with it staying in the bathroom.

We had the shower mixer tap but couldn't find the shower itself anywhere but Steve the builder managed to source us a great one which was ex display for a very good price.


We decided to go for plain white tiles and a silver flooring so that we we could ring the changes as we wished colour wise.

We already had the loo, shower cubical and sink however we had got a half pedestal for the sink (one that attaches to the wall and doesn't reach the floor ) but due to how things worked out and the fact we swapped round where the sink and loo were from the original plan the soil pipe had to come out of the floor so we had to find a different option. The plumbing suppliers weren't sure if we could get a pedestal that would fit and anyway when we went and looked round we liked the idea of a cabinet but most of the ones we saw were to be honest a bit tacky.

A quick interlude for a sweet story. When we went to the plumbers Treestump (nearly four) wanted to come with us and had fun exploring round the bathroom showroom but when we got to the counter to ask some questions he asked me "Where are the plums? Plums are yummy !"  Poor kid though plumbers sold plums which is why he wanted to come with us !

So what to do about the sink? Head to IKEA of course ! They do bathroom sink units but we decided to go for a kitchen wall cupboard and use an off-cut of oak work-surface we had left from the kitchen. The doors aren't on yet as they were out of stock and are being delivered on Friday. We chose blue frosted glass as doors can be changed fairly easily and it will add a bit of colour. We decided against putting it on legs and instead just have it slightly raised off the floor because otherwise it was getting too high to use comfortably.


I think once the doors are on it will look quite smart and give us useful storage space too.

So what is left to do? Clean the window and get rid of the stickers that are on it. Put the doors on the cabinet and put more coats of oil on the work-surface (I've done  two so far).

Also decide what to do about a toilet roll holder as the loo has ended up farther from the side wall than planned to allow the soilpipe to work and I hate holders on the wall behind you, I end up doing my shoulder in trying to use them. I'm thinking of a small shelving unit to go in the corner between the loo and the towel rail for extra towels so perhaps that can do double duty somehow.


The towel rail runs off the hot water pipes which confuses every plumber and builder we have ever had but this lot at least listened and read the handbook when I showed it them unlike some we have had.

We may want some sort of shelf in the shower too for soap and such like and a mirror of course.

Just as I was thinking about writing this post I came across a blog Funky Junk Interiors and as it happens she is running a challenge for Jan to get a room Picture Perfect. ie do all those finishing touches that never quite get done so I'm committing to doing that for the bathroom this month.

I'd love to say I will do the kitchen too as all that it needs is a few tiles BUT that would mean clearing it of all the accumulated bits and pieces first which I keep trying to do and never managing because otherwise even if I finished it would hardly be picture perfect would it ! Perhaps next month.

The next big job is clear all the rubbish and accumulated stuff out of the loft which hopefully will give me enough work room to be able to finished the underfloor heating in there. Ideally I need to be able to have at least half the room clear at a time.

This is what it currently looks like.


As you can see lots of rubbish and spare building supplies There are also a lot of tools and other bits we do want but I am sure they can be rationalised and stored better. Once the pipes are in we can get on with decorating the room and then we can hopefully move someone up here leaving their room free to be sorted. That's the plan anyway. I'm also hopeful we can get the hall to the stage we can decorate it soon as well.

Monday, November 28, 2011

A new outfit for a wonderful wedding.

A week ago we were just getting back from one of the most wonderful weddings I've been to. Then I got tonsillitus so I'm only just getting round to blogging about it now.

When I tell you we stayed here.


and I tell you the wedding was black tie you may see why I thought I wanted to make a real effort. Though mostly it was the fact it was my husband's only brother getting married which is a once in a life time event regardless of venue.

The hotel was fantastic as you would expect given the number of royals and other internationally important people who have stayed there. The ones most people will know of being the Middletons for the recent Royal wedding. The dining room and indeed pretty much everywhere we ate the entire weekend were totally clued up on Celiac and took it in their stride. For once I didn't feel I had a very limited selection or that I could only have sub-standard dishes without the sauces and so forth as is so common in other places.

For the wedding I wanted a dress and jacket as it is November and you never know on the weather. It was actually pretty warm for the time of year but the jacket was still a good idea.

After considering several patterns I went for these two.

Vintage Vogue 2859 from the thirties
I'm never going to look that long and slender but still it's an interesting design.

and
Butterick 4919 which is again a vintage pattern this time 1950's

I planned to use the jacket from the first and the dress from the second but with a straighter skirt as I wanted evening dress not ballgown in feel. In the end I took the skirt off the dress in the first pattern which worked very well.

I did a mock up of the jacket in a leaf design cotton I got cheap from IKEA which I'll post when I've done the finishing touches to it as I stopped once I'd worked out what did and didn't work. Actually the fit was pretty good though the shoulder darts weren't quite right.

I mocked up the dress from the first pattern in a nice floaty satin I had spare, mostly to check the fit on the hips. Again I will finish it, this time as a nightly I think as it's a bit minimal on top for me to wear otherwise given my shape. I decided to add a couple of inches ease as while it fitted it was a bit TOO close to not show off lumps and bumps even with magic pants.

The dress bodice I used with no alterations. The pattern fitted quite well and is a very interesting design as there are NO side seams. The front pieces extend all the way round the back and are hook and eyed at centre back only then do you do up the back zip. Then the back panels extend and become the sash which you wrap round the front in a variety of ways then take round to the back to be done up ! Quite fun and very un-usual and really not that easy to do up on your own !

I made the final versions in two different fabrics. For the dress I used a silk/cotton mix satin which is one of my favourite fabrics, over the years I've bought it several times in different colours when I've had the chance and I had several yards of the lilac left I'd been keeping for something special for me.. I think this is good reason to use it.  I paired it with a slightly pinker toning Chinese brocaded satin with a cherry blossom design for the jacket.
 I think the back looks great, The flowers in my hair are free style machine embroidery on water soluable fabric which was mostly washed out and then they were dried in an egg box to give them some shape. I used the same colours as I embroidered the dress with.

Please ignore the slightly zoned look on my face I don't like having my photo taken and I think the champagne was starting to kick in by that point. If it looks like I'm in a tent it's because I was or rather a fantastic double teepee which is where we had drinks at the beginning of the reception.

I forgot to get a photo of just the dress so will have to get someone to do that for me later. The shoulders are still a little blocky on the jacket even though I adjusted them from the original design, My shoulders are so narrow I suspect it isn't an ideal design for me but I do love the seams on the back view and it went together surprisingly easily. The sleeves look a little long in that photo but there really arn't, however the fabric is one that creases if you look at it hence the amount of creasing on the sleeve.

The dress itself worked OK though when I put it on the neckline suddenly seemed very low and I could see a lot of bra but while I would add a bit to it next time I think it was mostly my rather unique viewpoint and not so bad from where everyone else sees it ! I embroidered two birds with flowers either side of the bottom of the front split which I think worked well though it's hard to see in the photo as I did it in toning shades. I considered doing more but time was against me and actually to it could easily have become too much. The sash ended up a little short so I put hooks and eyes on it then couldn't get them to work when I had to finished getting dressed on my own as Jon was off early being an usher so in the end I safety pinned it !  With jacket on no-one could see.

This is what  it should have looked like

 This is me and Jon, doesn't he scrub up well !  Probably be another ten years before I get to see him like this again !  The sash on the dress rather disappears in the very narrow gap between my bust and waist unlike on the pattern ! Oh well I'm never going to be a super model shape am I.

The wedding was fabulous, organised amazingly well by my new sister in law who is lovely as are the rest of her family and I wish them both many many years of happiness together.

Saturday, November 12, 2011

Socks

Gosh it's a long time since I posted hasn't it.

I have been busy and trying to do things rather than blog about them. One day I may be one of those mega organised people who manages both. Mostly I've been busy with other stuff not craft related and with moving everything into the workshop and getting it sorted. It is lovely to have so much space and I'm gradually finding everything that had been spread to the four winds and getting it all together.

I have also started knitting !  I did learn to knit as a kid but as my mum said I only made a couple of things and then decided it was boring. A few years ago I learn crochet and generally i prefer that and its quicker however as with all things there are some things that just work better in a specific medium. For knitting one of those things is socks, crochet ones just come out to thick to wear in shoes unless you have really, really thin yarn... so sock knitting is my new thing !

I have so far finished a whole one pair and another single sock.
The first pair are far too loose to fit really well and knitted on to big a needle but they are still lovely.

 First socks

The second sock looks much better though I made mistakes following the pattern so it's different to what was written, but it works I just have to remember what i did differently to make the second which i need to get on with.  I also have three others on the needles currently.


1) A simple rib pair for Treestump who was sure he needed some.

 The start of Treestumps socks.. have done more than this now.

2) One of the tour du sock patterns Phellogen (ravelry link) which has cables which is going slowly but well
and

3) A second tour du sock pattern, Chain Reaction (ravelry link ) which is my first ever try at colour work, I'm making them more like ankle socks and many people said the leg is very long and tight and I have big calfs.

Wednesday, June 15, 2011

My new workshop

I finally have a space to work in that isn't also the dining room or some other room of the house used for other purposes and isn't using part of Wookie's workspace which means dodging latex, plaster dust and paint.

At the top of our road is some workshops which have a mix of uses though originally I think they were all engineering of some sort. Now however they are a mix of engineering, storage for local shops and Mandala Studios which I have mentioned here before as I work with them at times.  Next door to the Mandala unit is one that I now have which was until recently someone dealing in car parts.

We have spent the last few days cleaning it as the down side of an ex-engineering unit is the grime and oil that impregnates the place. The upside is the size and ceiling height. Sugar soap is a wonderful thing however!


Here is my Friend Nikki standing against one of the walls to show the height. You can spot where we ran out of ladder height and so couldn't finish cleaning the wall at the top.


This is looking into the back corner after we cleaned and laid out a new carpet, the wooden wall is all that divides us from Mandala's grotto which is the room they use for storage and making big projects.. There was some carpet in places but it was old and oil stained so we got rid of that. It took a couple of days of brushing, scraping and cleaning to get all the dust and old underlay up and the walls clean enough to put the carpet down. There are all sorts of blocked up openings in the wall which make me want to research the history of the building.


This is looking the other way. You can see the double doors into the unit on the  left and the office in the right. There is a big skylight at this end of the room which is the bright white bit at the top, shame it isn't in the middle so it can be over the cutting table but you can't have everything. I suspect originally there were big windows along the top of the long wall  (you can see one at the top left of the second photo) but if so they have been blocked up for a good while.

The main bit of the room is about 5m by 6m with another 3 by 5m made up of the office and area by the doors. Plus because the room is so high if we get some proper industrial shelving we can store a huge amount of stuff vertically.

No problem running a industrial sewing machine either as the floor is designed to take much heavier machinery that that.

Friday we plan to stick the carpet down and start moving in sewing machines, tables, fabric, haberdashery etc from the various places they are currently stashed which is going to take several days I suspect. I have several friends keen to come and join me and spend occasional days sewing which there should be plenty of room for and it is always better to work with company.

Suppose this means I have no excuse not to get round to all those things I keep meaning to make now !

By the way this is what it looked like before the clean or rather halfway through.


Yes we really needed the masks the underlay of some of the carpet was that 'lovely' yellow stuff which is nasty to breath in.

Monday, June 06, 2011

Leaf Capelet

Finally something to post about. It isn't that I haven't been doing things I have but life has been very hectic in many ways.

One of the projects I have been working on over the last few months on and off is a present for my mum which was delivered this weekend so I can now post it.

The pattern comes from the Interweave Crochet Accessories 2010 Magazine and is called Claudia's Capelet.
Mum and I picked out at yarn we though would work well at the beginning of the year.

The leaves are worked individually in three different sizes by changing the hook size and this gave a nice subtle graduation in size. They are made just in double crochet (single for Americans) and as such are pretty easy the only difference is most rows are done into the back of the stitch only which gives the prominent ridges. The leaves are then joined by a network of chains hanging off a simple neckband.

This is the first project I have properly blocked and that helped flatten it out a fair bit but there is still a bit of twist in the lower leaves.

Saturday, May 07, 2011

Some great free patterns

One of my favourite blogs Grosgrain is running a free pattern month with patterns from all sorts of other fabulous sewing blogs.

If you like sewing you should check it out.


So far there has been a wide range of different items so there shoudl be something for everyone.. well nothing for small boys yet but I live in hope :) however there is a couple of skirts, apretty outfit for a small girl, a headband and several more items and more every day.

Sunday, March 20, 2011

My tree for the year

Noddles has still not committed to what tree he wants to study though he says he does want to pick one. This is probably not helped by me having fasciitis which means I'm trying to limit the amount I walk on hard surfaces so I am not doing the school run unless no-one else is available and I'm afraid I am driving when I do, meaning we don't walk together past the trees every day at the moment.

However in the meantime I have decide to watch the apple tree on the allotment so here it is.
This is inspired by The Tree Year.


Last year this tree was covered in fruit though I am told it has a tendency to fruit every other year so I do hope it has a few apples this year or the boys will be very disappointed.

I don't know how old the tree is but certainly a good few years old and for much of that it probably hasn't had a lot of care. The last couple of years this plot was looked after by someone who knew his way round a tree but before that most of this plot had been planted up with Christmas trees and many of the plots on the allotments had been virtually untended for years.. very much not the case any more and indeed the allotment has just been allowed to re-open a bunch of old derelict plots which were outside the site fences until a week or so ago ! There are still a bunch more but the council are keeping them even though they are no longer planning to build an incinerator there, which is a shame as there is a fabulous huge Bramley tree on one of those plots !

Anyway back to our tree. It has a spread of about 20ft and has several noticeable pruning marks including these ones, the bottom one is quite a noticeable hole.


There is a nesting box rather randomly hung halfway up the tree which blue tits are certainly considering the last few times I have been up there.
It has lovely bark.

This weekend I noticed the first signs of the buds starting to pop though they are far from open yet where as the crab-apple tree is almost in leaf already.


I suspect it is a later flowering and indeed fruiting tree because some of the windfalls were still intact and edible a few weeks ago when I found them hidden under other more eaten ones which makes me think it's a later fruiting apple which will keep well. Hopefully it will give us some fruit this year to confirm or refute that.

Wednesday, March 16, 2011

Crochet Freeform CAL

The Freeform CAL is great fun and I'm actually managing to keep up.

Treestump who is now the grand old age of three has decided it is a treasure map and that was before we were told to crochet a volcano for it !

I missed off that the grey pearls are coins !


Here it is from a worms eye view !

Saturday, March 05, 2011

Table flowers and freeform CAL

Firstly the table-mat flowers. 
So far I have made two!  Both with blue petals and yellow middles though the other rows differ slightly. So I know I want 8 as we have an 8 sided table but do I do them all blue petals or do I ring the changes? I was thinking yellow could be primrose like and perhaps even green petals as I love ariculas to !  I also want to work out a mat for the middle of the table and perhaps some leaves as coasters.

I'm going to put the pattern at the bottom of this post as much for me as anything.

In other news I realised the free-form CAL on Ravelry has started again. As some may remember I did this back when I had only recently started crochet and was housebound waiting on Treestump to arrive.. he did halfway through and I still manage to finish the CAL as I was enjoying it so much, so as we come rapidly to his third birthday I'm doing it again. I'm a little behind having only found it last night but here is days one to three.

The other thing I realised is this red yarn *really* doesn't photograph well !

Table Flowers

(using British terminology)
6mm hook and two strands of double knit.

I used a magic loop to start but a short chain would work too.
Row 1 - 12 tr, slip st to first tr  (12tr)
Row 2 - ch 3 (counts as first tr), (ch 1, tr into next tr) repeat 11 times), ch1 slip st into chain. (12tr, 12ch)
Row 3 - Change to second colour. Ch 3 (first tr), tr into each stitch round circle, slip stitch into chain at the end (24 tr)
Row 4 - Change colour. Ch 3(first tr), tr into same stitch chain comes from, 2tr into each st round circle, slip stitch into chain at the end (48 tr)
Row 5 - Change colour. Ch 3 (first tr), tr into same stitch as chain, (ch 6, miss two stitches, 2tr into next stitch, 2tr into next st) repeat 11 times, ch 6, miss two stitches, 2tr into next stitch, slip st into chain. (12 sets of four tr and 12 6ch)
Row 6 - change colour, dc into middle of a set of four tr, (12 tr round the next ch6, dc into middle of next set of 4 tr) repeat 12 times. fasten off. (12 petals)

Thursday, February 24, 2011

Flower Bed group


 As some of you may have noticed a lot of people who blog about crochet have been making flowers recently like Lucy at Attic 42 and and Suz at Suz's place. In fact so many people have been having fun with them that a new group has been started for anyone who wants to make a blanket of some sort out of flowers. It's called the Flower Bed and if well worth following to see just how different the same (or similar) designs can be when done in different yarns and sizes.

I have done a blog post over there about trying out some versions myself. The one above is what I'm planning to make more of to make into a blanket. It isn't quite the Japanese design many people are using but you can find the pattern for this design on the Flower Bed as it is a variant designed by Suz. I have five colours of chenille yarn, three in variants of pink/rust as well as the yellow and green.

While trying out options I also did a version in 2 strands of double knit which I really like, well perhaps not the colours I picked so much but the design is nice. This was done with a 6mm hook and is really quite thick and snuggly.
 From that sample and Tom's comment it looked like a coaster for a teapot a second plan was hatched.
This is where I have got to so far.


It is a different design again and was sort of winged last night while roleplaying so once I have made sure it works properly I will write it up. It comes out about 10" across and I plan to make several as a set of spring coloured placemats !

Considering I normally lean towards smaller rather than larger I am surprised to find I am enjoying making something so big and chunky.

Tuesday, February 22, 2011

A year of a Tree


 I have just found this idea via another blog. You can find the full idea here at A Year of a Tree.

Basically you pick a tree and observe it regularly through out the year seeing what it is like and how it changes over time. I have had a word with Noddles and we have agreed we will do it and pick a tree in the park we walk through every day to go to school.

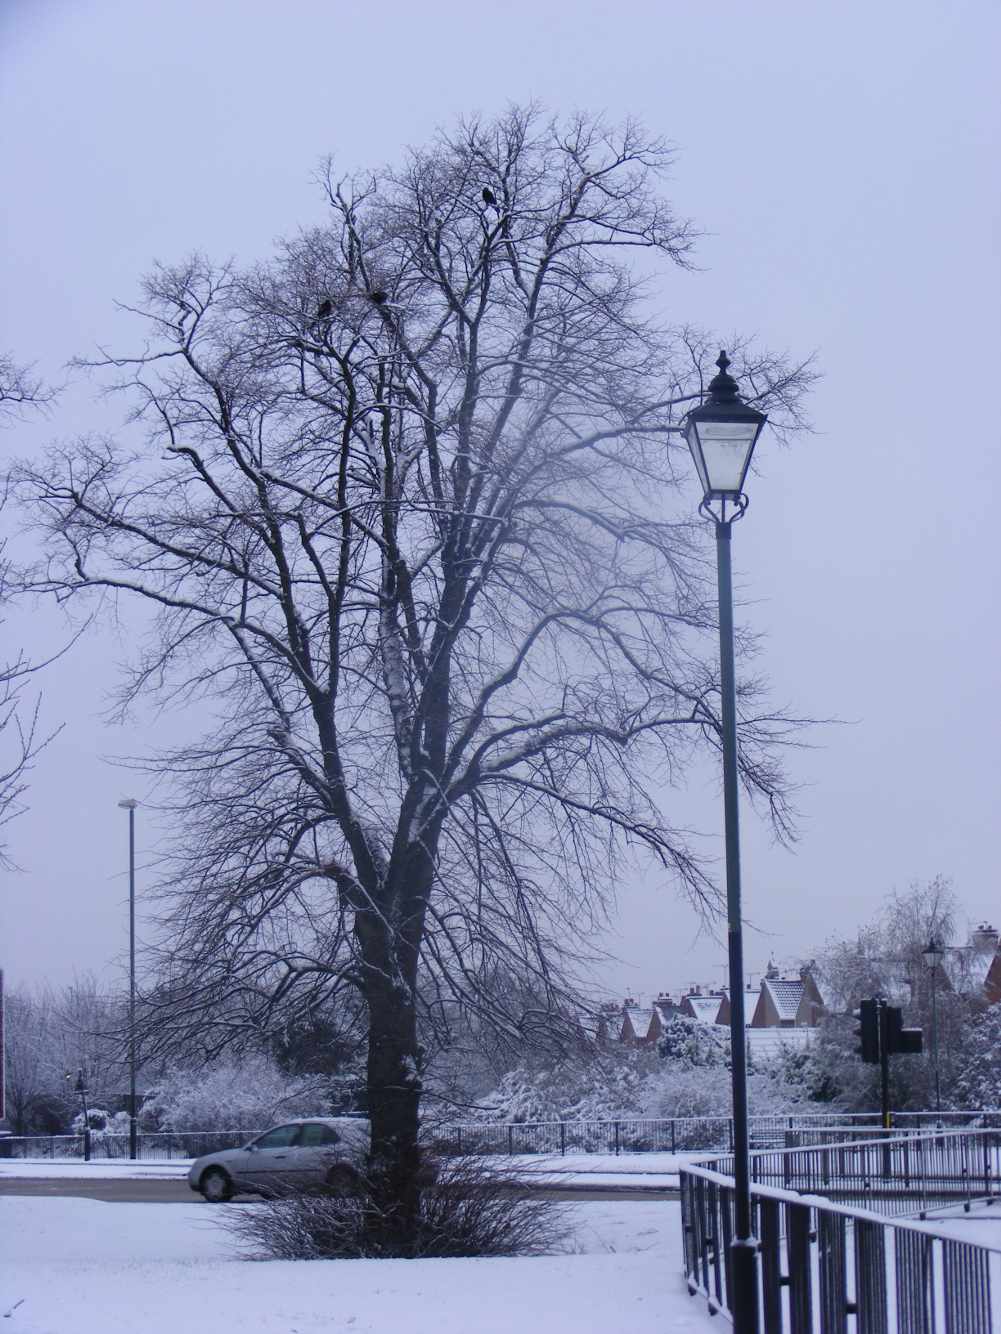
The photo above is part of the park taken last year in the snow. We will go over sometime this week and chose a tree, it's half-term so one of the few weeks in the year we aren't going through it daily!

This is another part of the park

and these two are a couple of big mature trees just outside the park we sometimes walk past if we go round instead of through the park.


So plenty to choose from and that's without considering the trees lining Binley Rd or the Conker trees in the other park or all the trees on the old railway embankment between the school and another public green space on the other side of the road !

Once we have chosen our tree I will post here and join the Year of a Tree group properly.

Sunday, February 13, 2011

More Termari

I have made a couple more Temari recently.

The first is in various shades of yellows and oranges. It is basically done by wrapping thread round the mari (the base ball) in a specific pattern using pins to keep them tight together at the circumference of the ball and then adding a band of copper coloured thread round the middle which takes the place of the pins to hold the threads in place.


The Second was done as a stitch along on the Talktermari Yahoo group which is a wonderful group to learn how to make these balls.  The way the stitch along was done I didn't know what we were making when we started and it was quite an exercise in following purely written instructions. The result was a turtle ! I repeated the pattern but smaller on the other side. I am undecided if I should add anything more in the way of decoration to the termari or not.


Blog Content

All of the photographs on this blog have been taken by Esther, that's me, unless they are being used to link to giveaways etc in which case they belong to the person who I am linking to. All text is my own words.
None of the content of this blog may be used without my permission.